- click the local machine and click next

2. Specify the file you want to import ( Prefer default ) and click next.
3. At the password session, you can Click Next since it has no password at all.
4. At the Certificate store, choose “Place all certificates in the following store” and select browse.
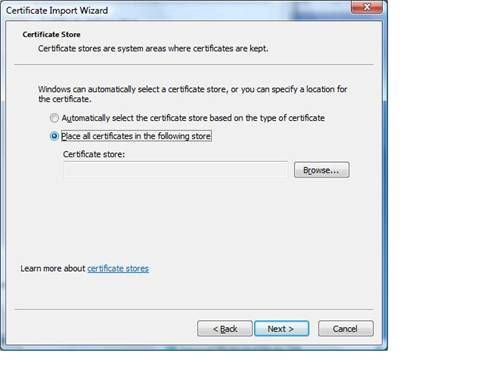
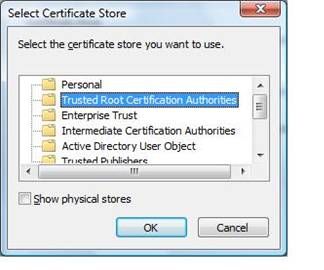
5. Select Trusted Root Certification Authorities and click Ok.
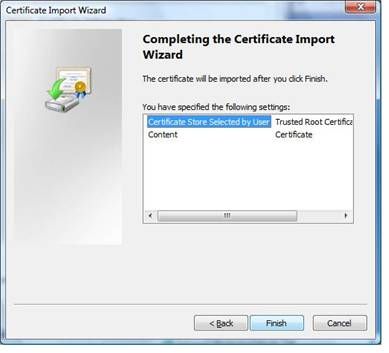
6. Click Finish on Completing the Certificate Import Wizard
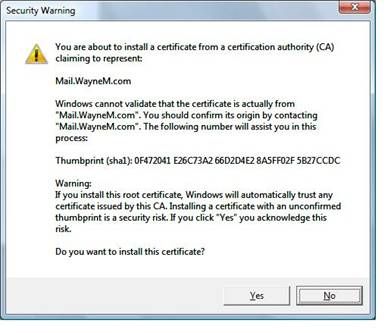
7. Click yes on the security warning to install the certificate
8. If you want to verify the certificate has been installed you can load the certificates snap-in and you should see it under Certificates –Current User-Trusted Root Certification Authorities-Certificates.
